|
Brick Raised Beds
Gardening is a therapeutic and rewarding hobby that allows individuals to connect with nature and enjoy the fruits of their labor. However, limited space, poor soil quality, or physical limitations may pose challenges to aspiring gardeners. One solution to these obstacles is building a brick raised garden bed.
Step 1: Determine the Location and Size
Before embarking on your garden bed construction, it is crucial to select an appropriate location. Consider factors such as sunlight exposure, accessibility to water sources, and the types of plants you wish to grow. Additionally, ensure that the area is level to facilitate the construction process.
Next, determine the size and shape of your garden bed. Keep in mind that the width should be no more than four feet to allow easy access from all sides. The length can vary depending on the available space and personal preference.
Step 2: Gather Materials
To build a brick raised garden bed, you will need the following materials:
Bricks: Opt for bricks that are durable and weather-resistant. Clay bricks are commonly used due to their strength and ability to retain moisture.
Mortar or Adhesive: Choose a high-quality mortar or adhesive specifically designed for outdoor use. This will ensure the bricks remain securely in place.
Level: A level will help ensure that your garden bed is even and balanced.
Shovel: A shovel is necessary for digging the foundation and removing any existing grass or weeds.
Weed barrier fabric: This fabric will prevent weeds from growing beneath your garden bed.
Compost and Soil: Good quality compost and soil are essential for plant growth and productivity. Consider using a mixture of topsoil, compost, and organic matter.
Step 3: Start Construction
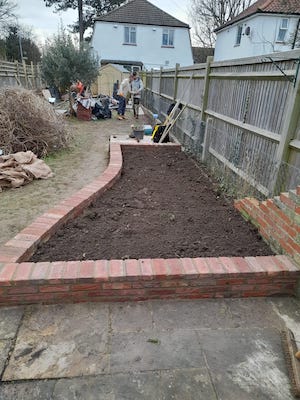
Begin by marking the boundaries of your garden bed using stakes and twine. Use a shovel to dig a trench along the marked lines, approximately four to six inches deep. This trench will serve as the foundation for your garden bed.
Next, lay the weed barrier fabric at the bottom of the trench to prevent unwanted growth. This fabric will allow water to drain while keeping weeds at bay.
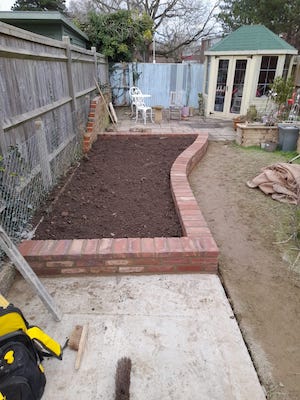
Now it's time to start adding the bricks. Apply a thin layer of mortar or adhesive to the bottom of each brick and place them tightly together, ensuring they are level and plumb. Continue laying bricks in this manner until you reach the desired height. Remember to periodically check if the bricks are level as you progress.
Step 4: Fill and Plant
After completing the brickwork, it's time to fill your garden bed with soil. Remove any debris or excess dirt from the trench and fill it with a mixture of topsoil, compost, and organic matter. This nutrient-rich soil will provide a fertile environment for your plants to thrive.
Once the bed is filled, give it a good watering to settle the soil and remove any air pockets. At this point, you can start planting your chosen plants, herbs, or vegetables. Be sure to space them appropriately, considering their eventual size, sunlight requirements, and watering needs.
Step 5: Maintain and Enjoy
Maintaining a brick raised garden bed is relatively simple. Regularly water your plants, ensuring they receive the appropriate amount of moisture. Additionally, remove any weeds that may sprout in the surrounding areas.
Every year, it's a good idea to replenish the soil with fresh compost to maintain its fertility. This will provide your plants with the necessary nutrients to thrive.
A brick raised garden bed not only offers a practical solution for limited gardening space but also adds an elegant touch to your outdoor landscape. By following these steps and investing some time and effort, you can create a beautiful and productive garden to enjoy for years to come. So, put on your gardening gloves and get ready to unleash your inner green thumb!
|