
|
Brick Paths
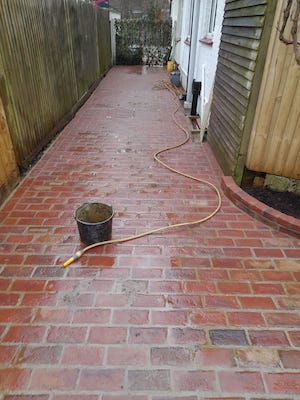
A well-designed brick path can add charm and functionality to any outdoor space. Whether you want to create a welcoming walkway or a picturesque garden path, laying bricks is a simple and rewarding DIY project. In this article, we will provide you with a step-by-step guide to help you create a beautiful brick pathway that enhances the aesthetics of your home.
Materials you will need:
Bricks of your choice
Crushed stone or gravel
Sand
Wooden stakes
String or twine
Shovel
Level
Rubber mallet
Plate compactor or tamper
Masonry saw (optional)
Safety goggles and gloves
Step 1: Planning and preparation Before beginning any construction project, it is essential to plan accordingly. Determine the desired width and length of your brick path. Mark the area using wooden stakes and string or twine to outline the path's edges. Make sure to measure accurately and take into account any curves or angles you wish to incorporate.
Step 2: Excavation Using a shovel, remove the top layer of grass, weeds, or any other vegetation present within the marked area. Dig down to a depth of approximately 6 inches, ensuring a consistent depth throughout the entire path. This step may vary depending on the desired thickness of the base and the bricks themselves.
Step 3: Preparing the base To create a stable foundation for your brick path, add a layer of crushed stone or gravel to the excavated area. Spread the material evenly and compact it using a plate compactor or tamper. This layer should be around 4 inches thick and will provide proper drainage for your path.
Step 4: Adding the sand layer Next, spread a layer of sand over the compacted gravel, ensuring a thickness of approximately 1 inch. The sand acts as a cushioning layer for the bricks and allows for minor adjustments during the laying process. Use a level and a straight board to make sure the sand layer is even and level.
Step 5: Laying the bricks Begin placing your bricks at one end of the path, following the desired pattern and design. Depending on the size and shape of your bricks, you may need to use a masonry saw to cut some to fit around curves or edges. Ensure that each brick is firmly pressed into the sand, using a rubber mallet if necessary. Continuously check the level and adjust the sand accordingly to maintain a flat and smooth surface.
Step 6: Finishing touches Once all the bricks are laid, sweep sand over the entire pathway, filling in the gaps between the bricks. Use a broom to ensure the sand is evenly distributed and reaches all the joints. This sand will act as a stabilizer and prevent the bricks from shifting.
Conclusion: Laying a brick pathway can be a gratifying project that enhances the visual appeal and functionality of your outdoor space.
|